
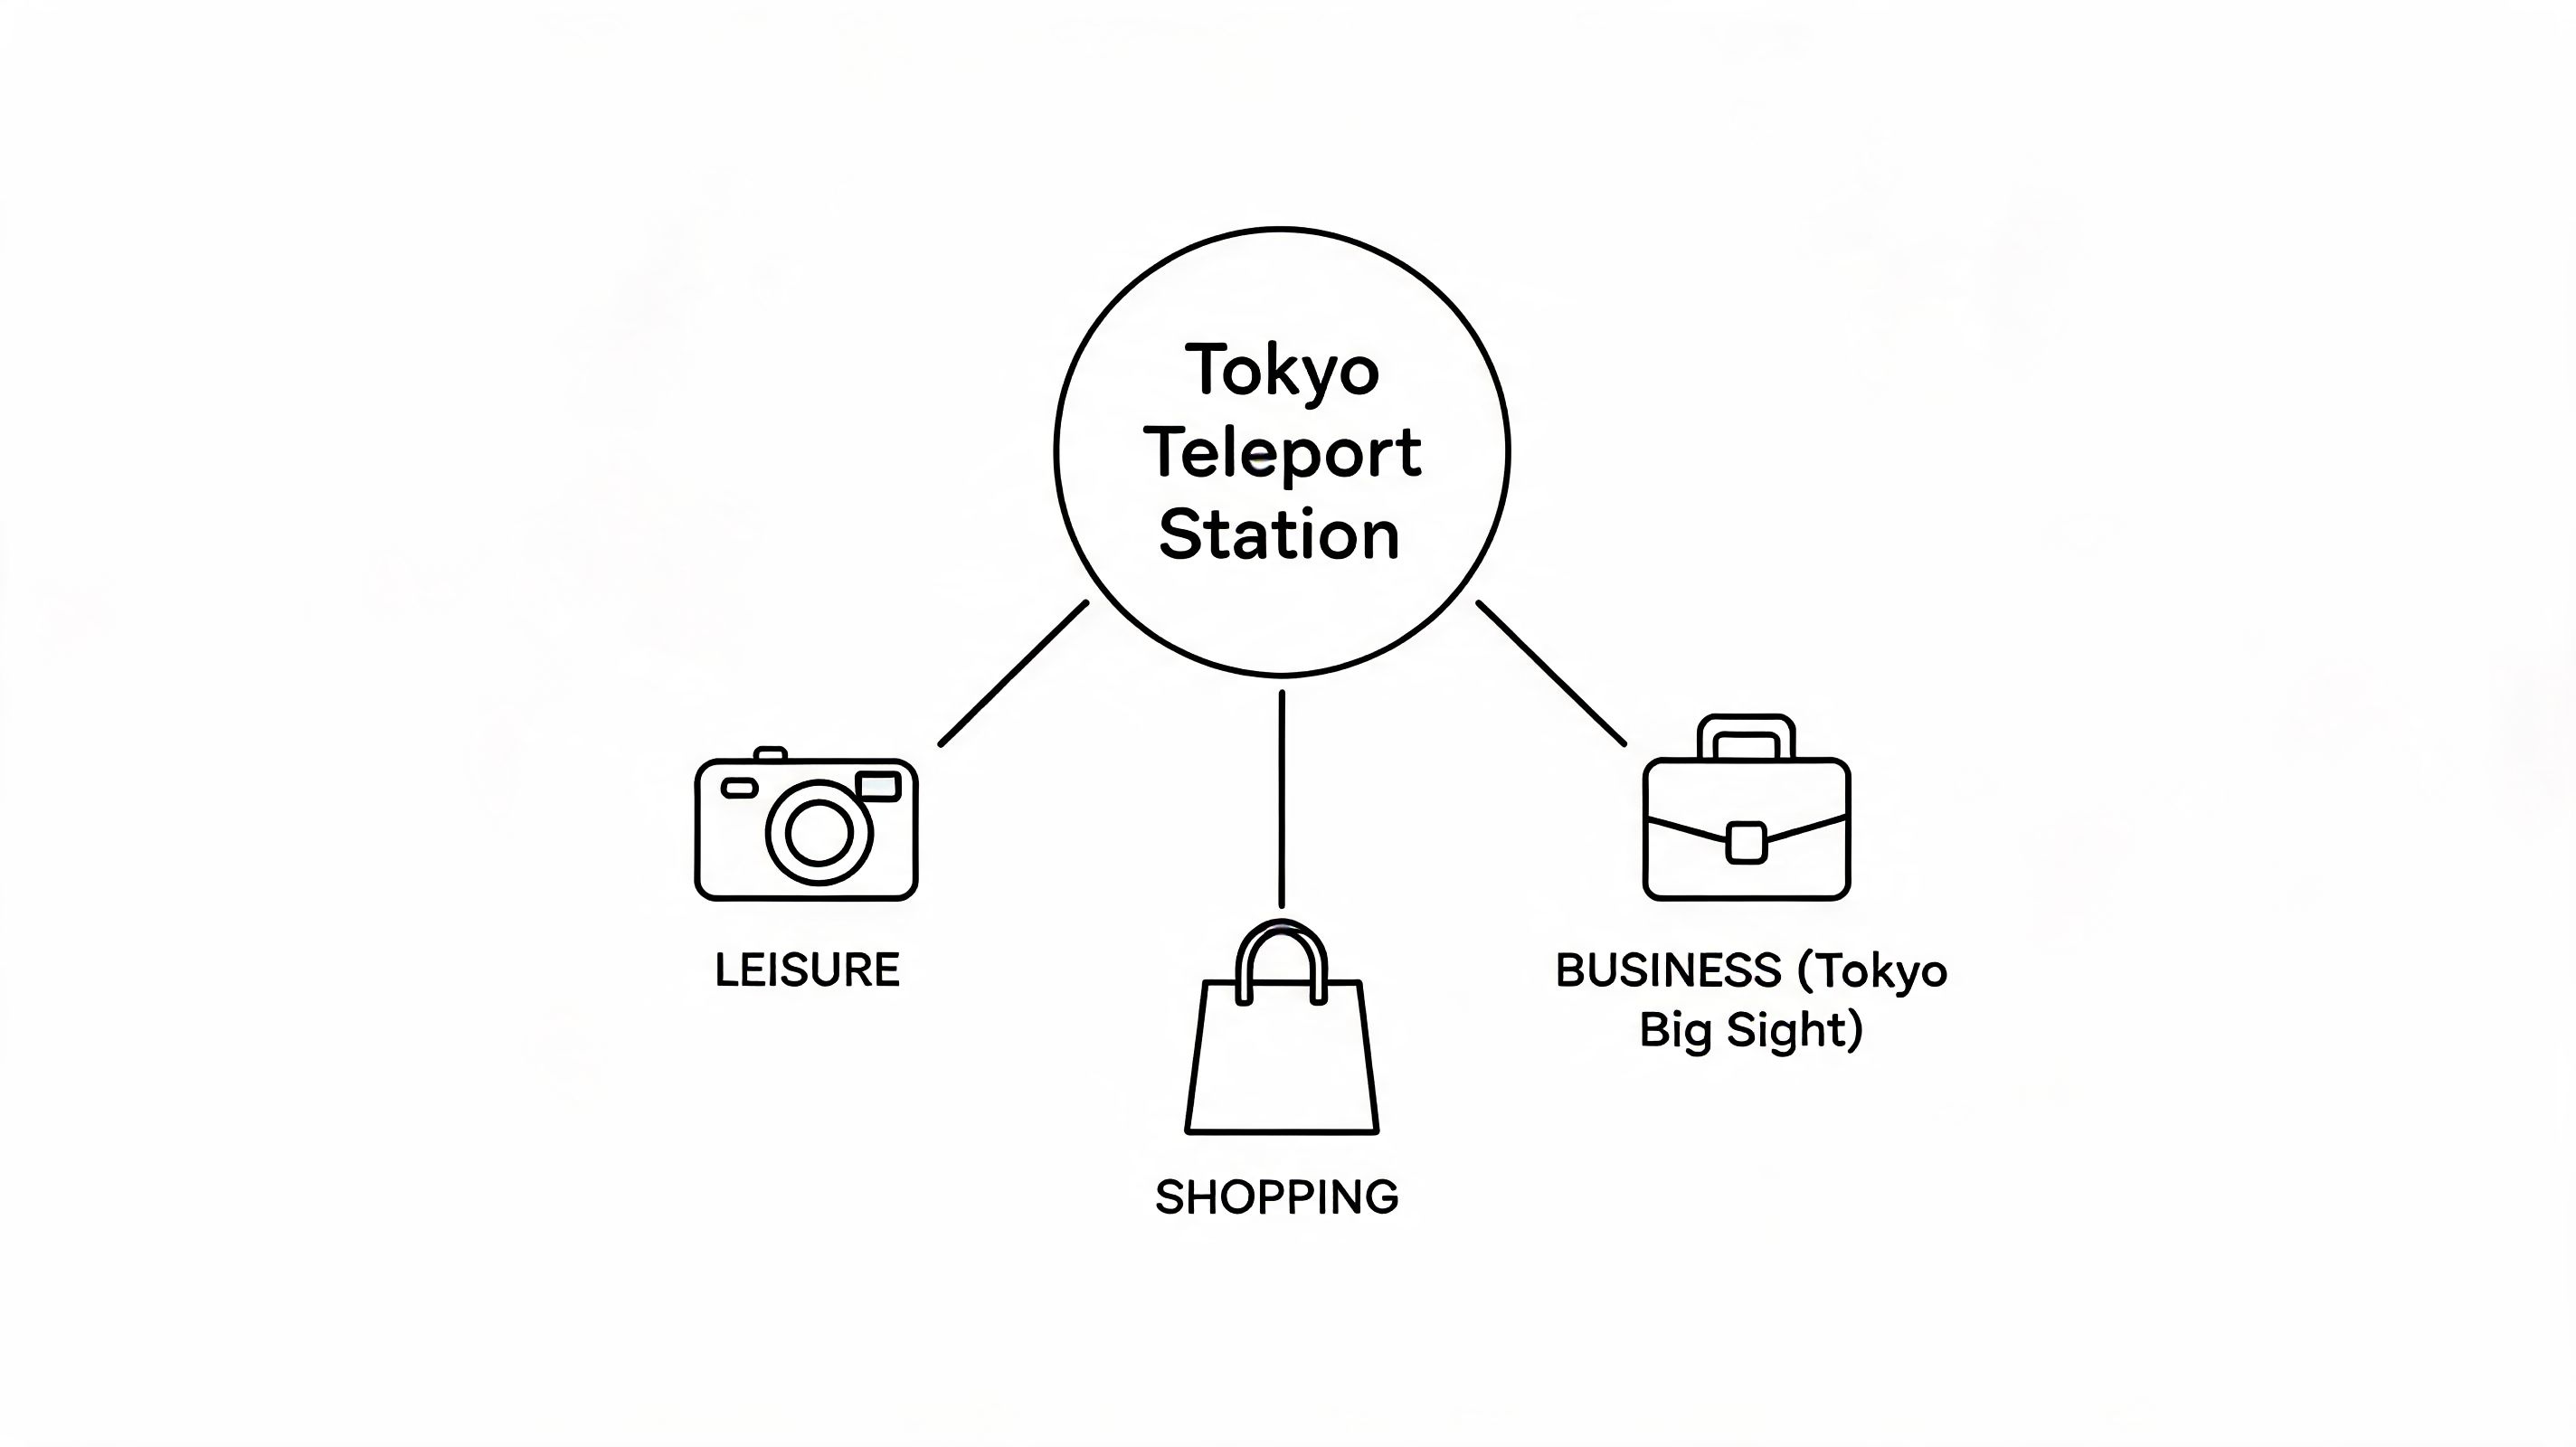
You’ve just landed, your inbox is still moving, and your first commitment in Odaiba isn’t flexible. That’s when tokyo teleport station stops being a curious station name and becomes the part of Tokyo transit you care about most. If your day involves Tokyo Big Sight, a hotel in the waterfront area, or a client meeting somewhere between DiverCity and Aqua City, getting this station right saves friction fast.
Most guides treat Odaiba like a leisure detour. Business travelers need something else. They need the route that minimizes transfers, the exit that avoids pointless backtracking, and the payment setup that doesn’t slow them down at the gate. That’s the lens here.
Table of Contents
Why Tokyo Teleport Station is Your Gateway to Odaiba
Why the Rinkai Line often saves time in real life
Best fit for conference days and short business windows
Your Arrival Plan From Narita Haneda and Central Tokyo
Choose by friction not just by speed
Travel Options to Tokyo Teleport Station
Business traveler route picks
Inside Tokyo Teleport Station A Step-by-Step Layout
What the station structure means for you
Fastest way from train to street
Exit strategy that saves real time
When to walk and when to transfer
Ticketing Hacks and Using Your IC Card
Why IC beats paper tickets
Common fare mistakes
Phone wallet setup is worth it
Business and Leisure Hotspots Near the Station
If work is the priority
If you only have a short free window
Automate Your Itinerary with an AI Assistant
Why Tokyo Teleport Station is Your Gateway to Odaiba
You land in Odaiba with 20 minutes to spare before a client check-in at Tokyo Big Sight, or you’ve got one free hour between meetings and dinner. In that situation, the station choice matters more than the skyline view. Tokyo Teleport Station usually wins because it gets you into Odaiba fast, on foot, and with fewer bad routing decisions once you step off the train.
A lot of first-time visitors choose the Yurikamome for the scenery. That makes sense for a first leisure trip. For a workday, the Rinkai Line is often the cleaner move, especially if you’re coming from the west side of Tokyo or carrying a laptop, garment bag, or small roller.
Tokyo Teleport Station sits on the Rinkai Line and drops you into one of the most useful parts of Odaiba for mixed-purpose trips. You can reach shopping, hotels, event venues, and taxi pickup points without spending the first 15 minutes figuring out which platform or waterfront stop you needed.
Why the Rinkai Line often saves time in real life
From Shibuya, Shinjuku, Ebisu, and Osaki, the Rinkai Line approach usually creates less friction than routing yourself onto the Yurikamome too early. The time difference on paper is only part of the story. The bigger gain is avoiding an extra transfer, extra stairs, and the common mistake of arriving at a scenic stop that is still a long walk from your actual destination.
Tokyo Teleport is also well placed for short, practical walks. DiverCity Tokyo Plaza is close enough for a quick meal break or meeting reset. Aqua City Odaiba and Decks are reachable without turning the trip into a half-day detour. If your schedule mixes work blocks and downtime, that matters.
Practical rule: Use tokyo teleport station when your day includes meetings, hotel check-in, shopping, or a direct walk to major Odaiba facilities. Switch to Yurikamome only if your final stop is better served deeper along its loop.
For travelers who plan visually before wheels-down, I often suggest browsing curated ideas instead of random search results. A quick look through these explore travel collections can help you map what kind of Odaiba day you want before you start pinning stations and exits.
Best fit for conference days and short business windows
A key advantage here is decision reduction. You get off the train, clear the gate, and move straight toward a hotel, mall concourse, taxi stand, or meeting point without burning mental energy on route cleanup. That’s a better setup for business travelers than a scenic detour.
It also works well with preplanned schedules. If you use an AI tool to line up arrival timing, meeting buffers, and backup transport, AI-assisted flight and arrival planning makes it easier to choose Tokyo Teleport as the anchor point for the day instead of improvising after landing.
That’s why I recommend it so often. It reduces walking mistakes, keeps transfers under control, and gives you a reliable base in Odaiba when the day includes both work and free time.
Your Arrival Plan From Narita Haneda and Central Tokyo
If you’re heading to tokyo teleport station, don’t ask only “What’s fastest?” Ask what creates the least friction for this arrival. A route with one fewer transfer often beats a technically faster chain if you’ve got luggage, low battery, or no patience for a crowded interchange.
Choose by friction not just by speed
From the airport, there are usually three real decision filters:
Speed first: best when you’re late and traveling light.
Luggage first: best when you’ve got a checked bag, sample case, or a carry-on that you don’t want to drag through multiple platforms.
Transfer simplicity: best after a long-haul flight, when a clean change at one major station is worth more than shaving off a few minutes.
Business travelers often overrate “fastest on paper.” In Tokyo, platform changes and station walks decide whether a route feels smooth or draining.
Travel Options to Tokyo Teleport Station
Origin | Route | Est. Time | Est. Cost (JPY) | Best For |
|---|---|---|---|---|
Narita Airport | Narita Express or other airport rail service to a major JR hub, then connect toward Ōsaki and continue on the Rinkai Line to Tokyo Teleport | Varies by connection | Varies | Travelers prioritizing rail continuity |
Narita Airport | Airport bus to Odaiba area hotel or nearby stop, then short taxi or walk depending on destination | Varies by traffic | Varies | Heavy luggage and easiest handling |
Haneda Airport | Keikyu route into central Tokyo, then connect through a JR hub and continue toward Ōsaki for the Rinkai Line | Varies by connection | Varies | Balanced airport-to-train option |
Haneda Airport | Airport bus to Odaiba hotel zone | Varies by traffic | Varies | Door-nearest arrival with bags |
Tokyo Station | JR lines to a transfer point such as Ōsaki, then Rinkai Line to Tokyo Teleport | Varies | Varies | Straightforward central Tokyo arrival |
Shinjuku Station | Saikyo line through-service toward the Rinkai Line, staying alert for train type and destination display | Varies | Varies | Usually the easiest west-side route |
I’m keeping time and fare estimates qualitative here because what matters most is the transfer pattern, and that changes by service, time of day, and where exactly you start inside each large station.
Business traveler route picks
From Shinjuku, the cleanest move is often the one many visitors miss. Look for a train that continues through toward the Rinkai side instead of assuming you need multiple changes. Check the destination board carefully. Don’t board on instinct just because the platform is familiar.
From Tokyo Station, don’t underestimate the internal station walk before you even board your first train. If you’re carrying bags, give yourself margin. The rail route is good, but “Tokyo Station to train seat” can take longer than newcomers expect.
From Narita, the luggage trade-off is real. Rail is predictable once you’re on it, but an airport bus can be the saner choice if your hotel is in the Odaiba zone and you want fewer physical transitions. For travelers managing flight details and ground decisions in one place, tools that combine itinerary planning with booking help can cut a lot of tab-switching. That’s where a feature like flight booking support is useful in practice.
If you’re arriving after a long international flight, protect your attention. Choose the route that asks the fewest questions of you.
From Haneda, rail usually wins on balance. The city is closer, and the trip tends to feel manageable. But if your hotel is directly served by airport bus and you’re landing during a busy part of the day, I’d still consider the bus for baggage alone.
A final habit that saves time: screenshot the last transfer point name, the final station name, and your hotel name in both English and Japanese before you land. When you’re tired, reducing tiny decisions is half the game.
Inside Tokyo Teleport Station A Step-by-Step Layout
You’ve just come off the Rinkai Line with a laptop bag, a roller case, and 20 minutes before a client meeting in Odaiba. Tokyo Teleport Station is one of the easier Tokyo stations to handle under pressure, but only if you make two decisions fast. First, get off the platform without drifting with the crowd. Second, pick your exit before you clear the gates.
The layout is simple. Trains use one central island platform underground, so orientation is easier than at the bigger transfer stations. That matters for business travelers because fewer branches inside the station means fewer wrong turns, less backtracking, and a better chance of getting from train door to street in a predictable time.
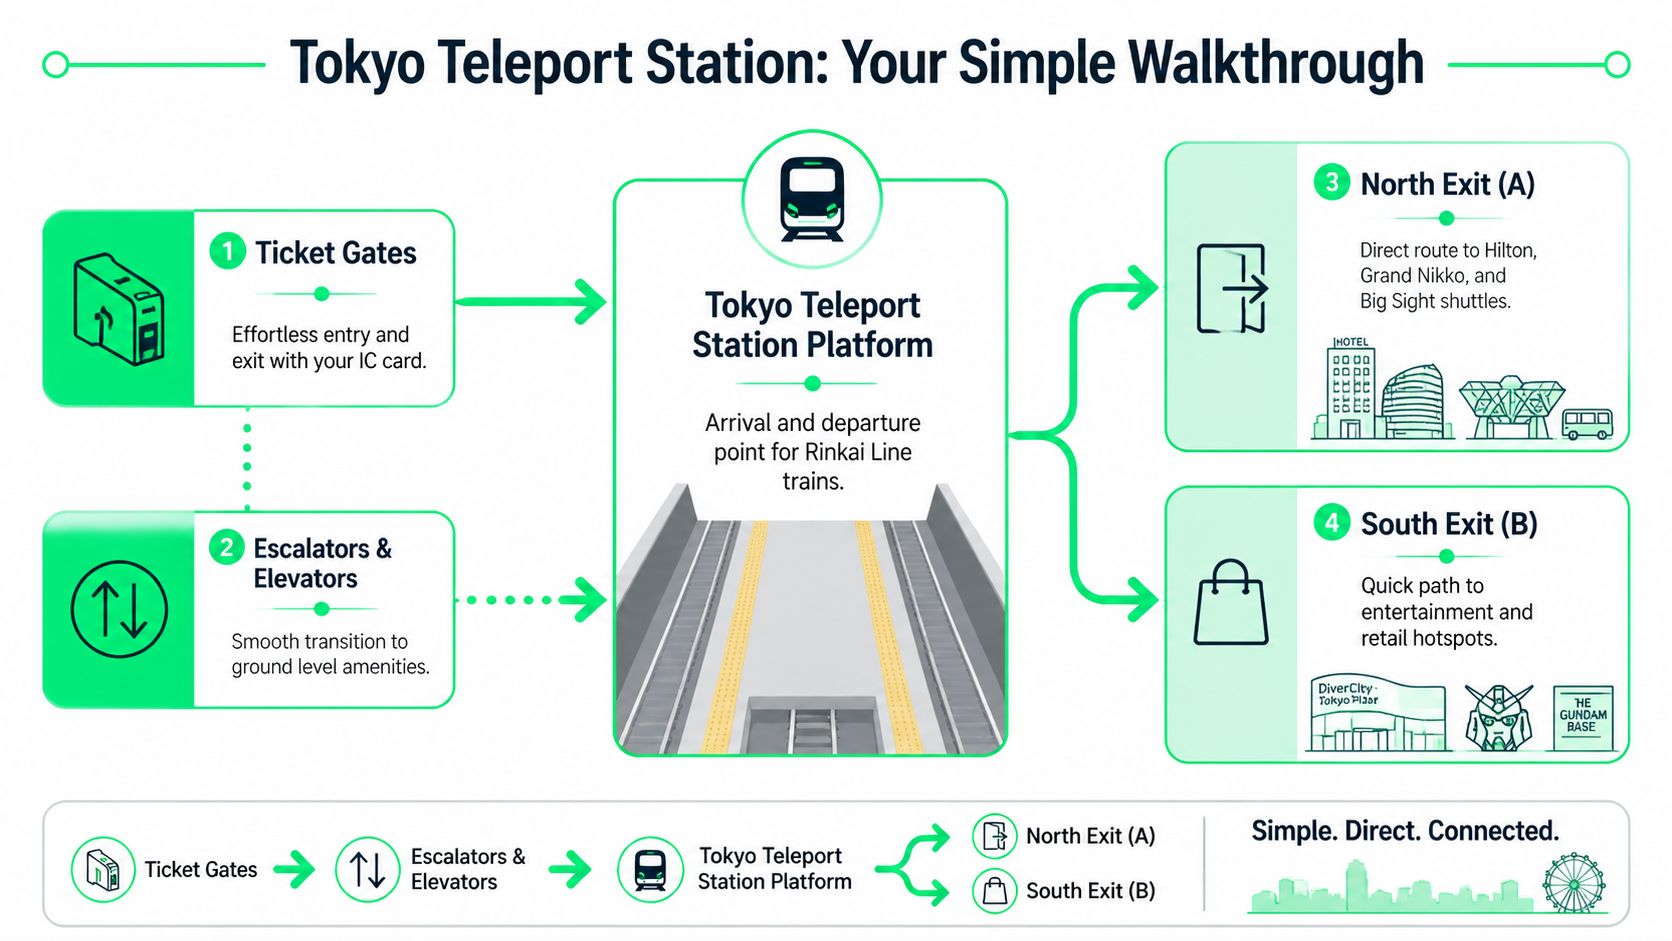
What the station structure means for you
Once the doors open, the job is straightforward. Move to the escalator or elevator, go up to the concourse, clear the gates, then commit to your exit. The station itself rarely causes delays. Hesitation after the gates does.
If you are carrying luggage, use the elevator early instead of changing your mind halfway through the walk. Saving 30 seconds on stairs is not worth getting boxed in behind commuters at the top.
A practical benchmark helps. From platform to gates, expect only a few minutes at a normal pace. From gates to nearby street level access points, add another few minutes depending on which exit you choose and how crowded the concourse is. Build in extra time if you need to stop, message someone, or sort out directions.
Fastest way from train to street
Use this sequence if your goal is speed:
Stand near the doors before arrival. Do this one stop earlier so you are not fighting past seated passengers at Tokyo Teleport.
Look for the nearest escalator or elevator as soon as you step off. Don’t stop on the platform to check maps unless you are unsure of the exit.
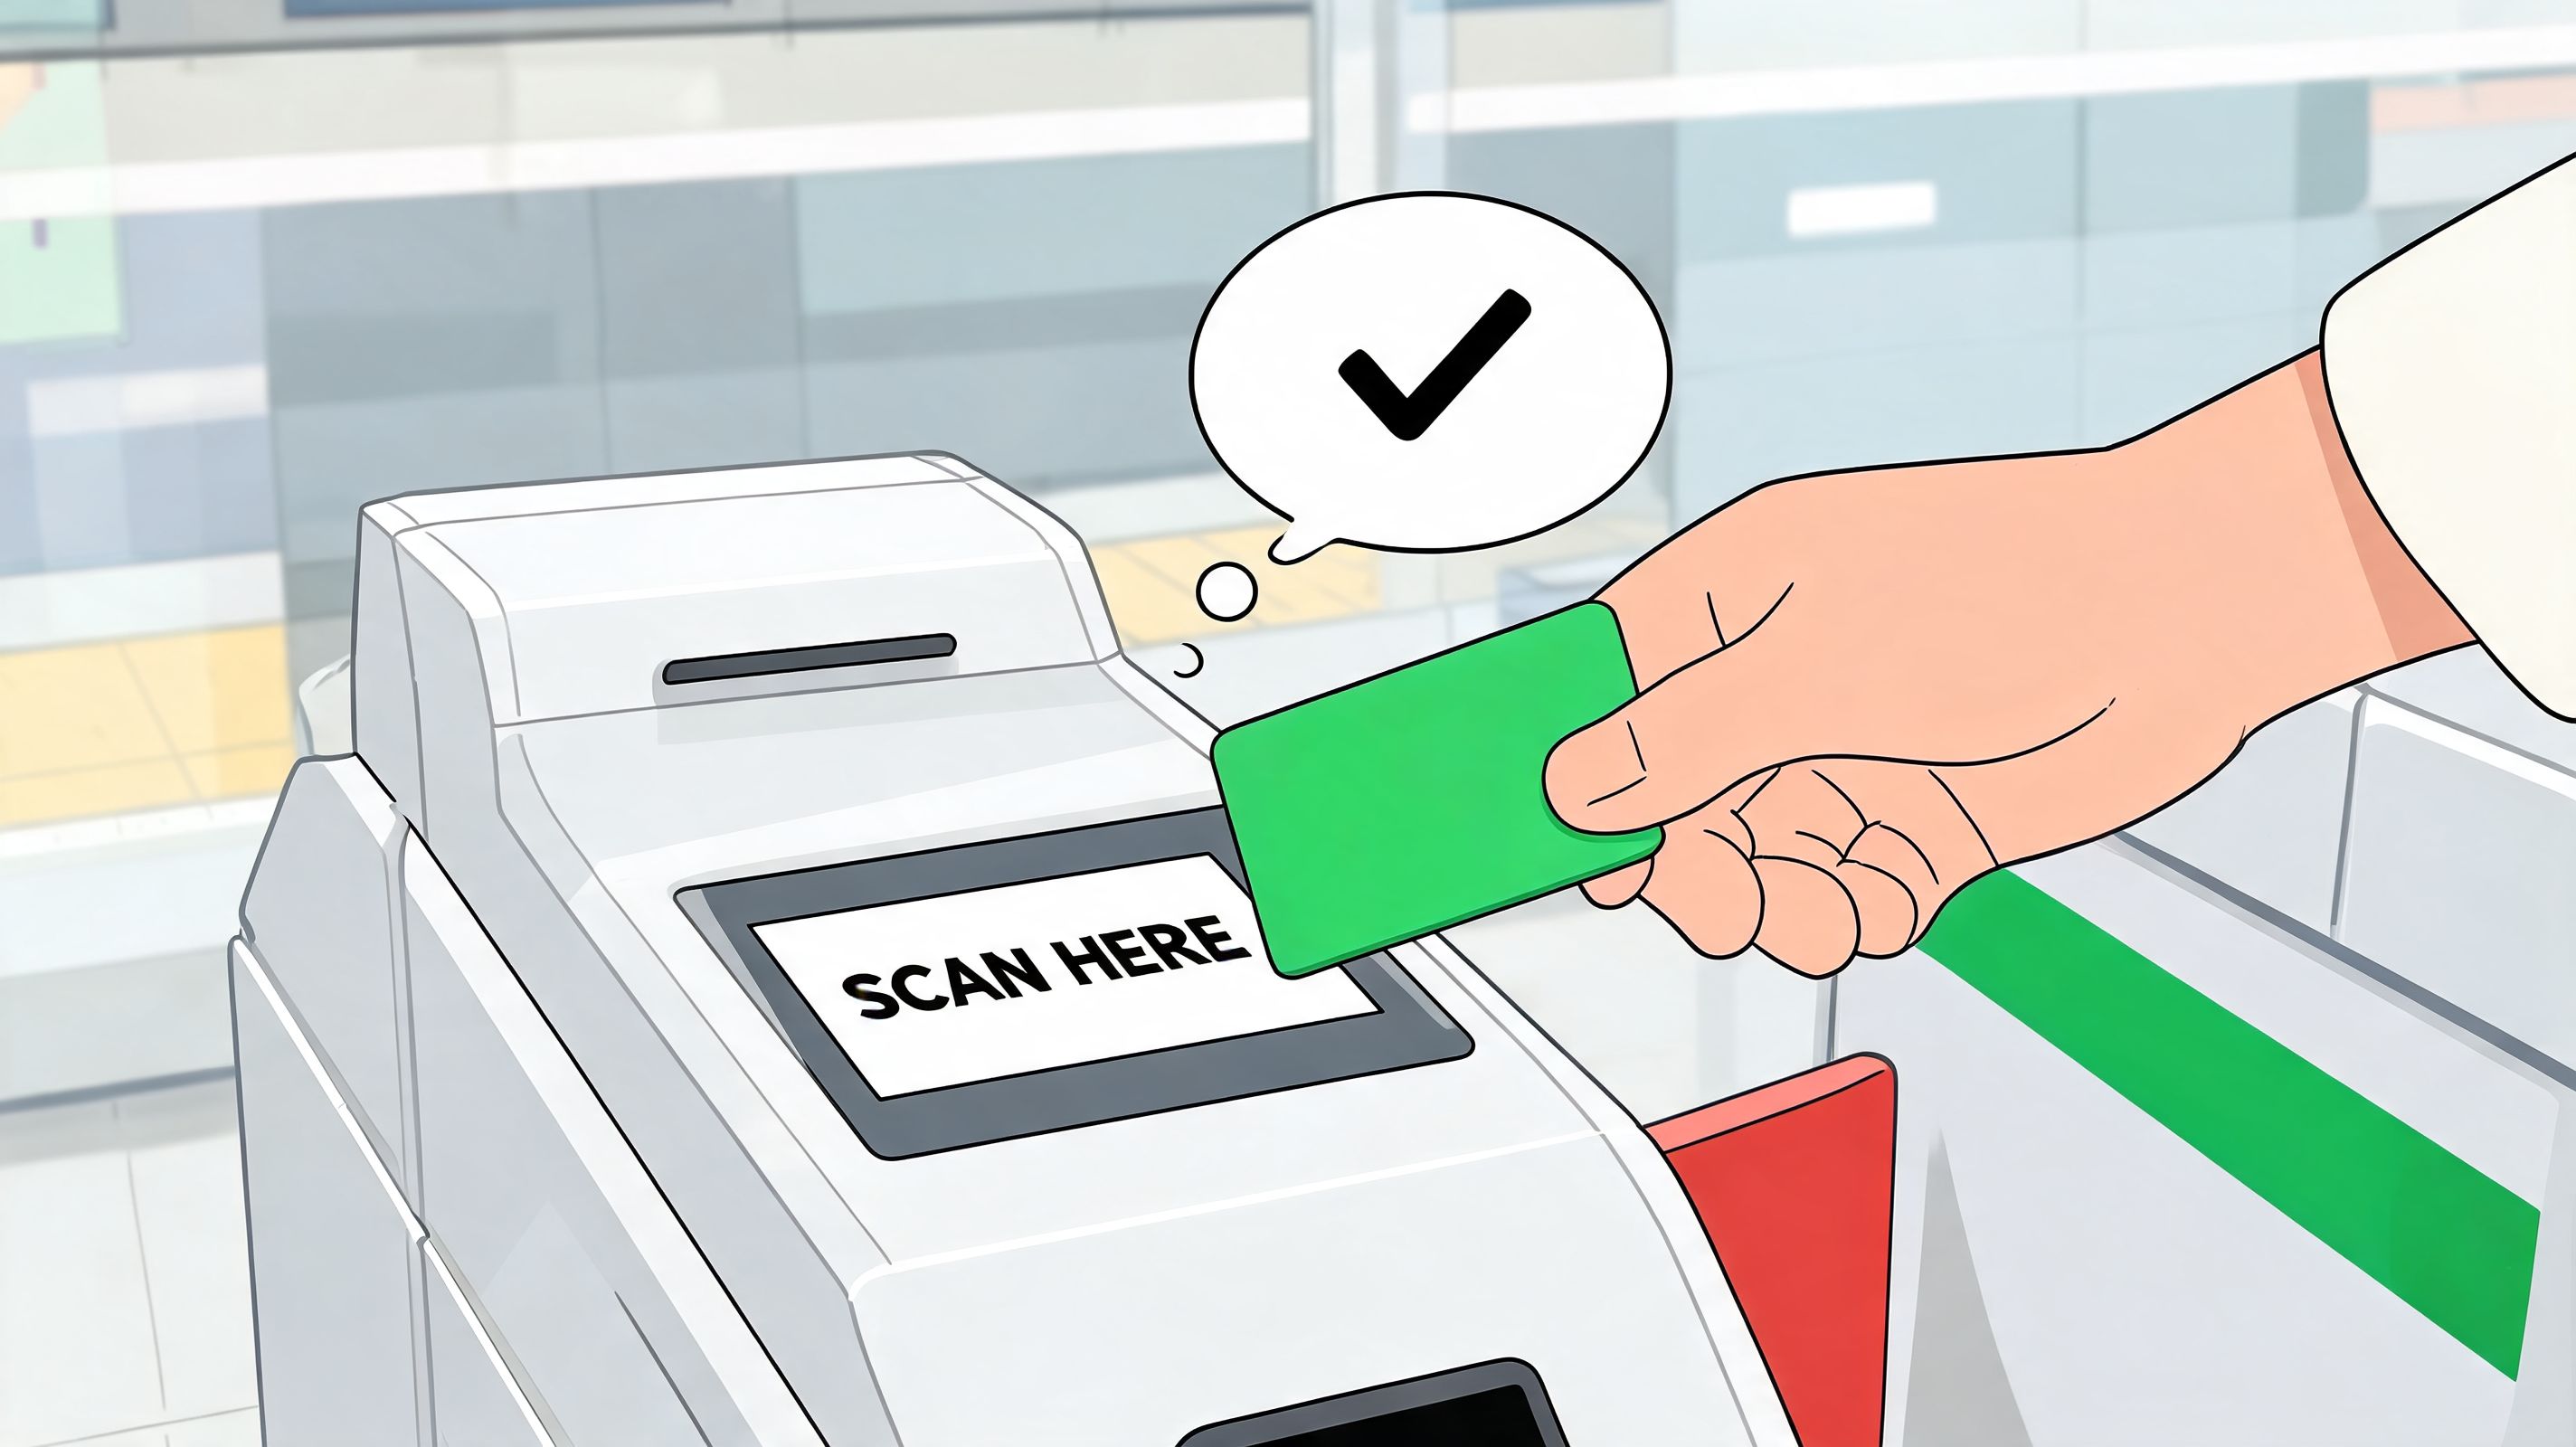
Have your IC card or phone ready before the gate line. Keep it in the same pocket every trip.
Clear the gates, then step aside. Do not freeze in the middle of the concourse to open Google Maps.
Confirm the final walking route only after you are out of the traffic flow.
For travelers who keep transit payments and trip details on one device, a mobile wallet setup for transit taps and travel info reduces that last-second fumbling at the gate.
Exit strategy that saves real time
Tokyo Teleport serves a few very different trip types, and your exit choice should reflect that.
For DiverCity Tokyo Plaza and the Unicorn Gundam area: expect a straightforward walk of roughly 5 to 8 minutes once you are outside and moving in the right direction.
For Aqua City Odaiba and Decks Tokyo Beach: the walk is still manageable, usually around 8 to 12 minutes, but pedestrian deck routing can slow first-time visitors.
For hotel check-in nearby: choose the exit that avoids doubling back across the open decks. This matters more with luggage than the raw distance suggests.
For taxi pickup or car service: move well clear of the gates before checking the app or calling your driver. The choke point is the concourse, not the curb.
The common mistake is assuming any Odaiba-bound crowd is going exactly where you are going. It usually is not. Shoppers, event visitors, and office workers split quickly once they hit the main pedestrian areas.
When to walk and when to transfer
If your destination is close to the station, walking is usually faster than adding another rail leg. That includes many Odaiba retail, dining, and hotel stops. For Tokyo Big Sight, Ariake, or spots deeper into the waterfront area, a transfer to the Yurikamome can still make sense, but only if it clearly cuts walking time at the end.
Here is the trade-off I use. If the transfer saves you a long outdoor walk in heat, rain, or with presentation gear, take it. If you are traveling light and the destination is within about 10 minutes on foot, stay on the ground and walk directly. One extra transfer in Tokyo often costs more attention than the map suggests.
For tight schedules, decide this before you board the Rinkai Line, not after you arrive. That is also where AI planning helps. If Superchat has already organized your meeting address, backup route, and walking leg, you spend less time standing under station signage making small decisions badly.
Ticketing Hacks and Using Your IC Card
If you want one piece of advice that prevents most station friction, it’s this. Use an IC card. Suica or Pasmo will make your trip through tokyo teleport station much easier than buying single paper tickets every time.
Why IC beats paper tickets
The Rinkai Line is a separate operator from JR, and that’s where many visitors get tripped up. With an IC card, you don’t need to stand at a fare map trying to decode transfer pricing after a long day. You tap in, tap out, and let the system calculate the trip.
That’s especially useful at transfer points like Ōsaki, where people sometimes hesitate because they assume they need a different process for a private line. In practice, the IC card keeps it simple.
Three habits help most:
Load before peak time: top up when you first arrive, not when a line forms behind you.
Keep the card accessible: use the same pocket every time, or add it to your phone wallet.
Check balance when passing a machine: do it opportunistically, not only when you’re about to run dry.
Common fare mistakes
The big one is assuming a standard Japan Rail Pass covers everything you’ll touch in Tokyo. It doesn’t automatically make the Rinkai Line free just because the previous leg was on JR. That confusion leads to awkward pauses at gates and last-minute fare adjustments.
Another common mistake is buying a paper ticket for one leg, then switching to IC for the next. You can do it, but it’s clunkier than it needs to be.
Quick check: Before you board, decide whether you’re doing the full day on IC. Mixed payment methods are where small hassles start.
A phone-based setup is often the smoothest option for business travelers who don’t want another object to manage. If you like centralizing payment tools on your device, a feature set like wallet management for travel payments fits that workflow well.
Phone wallet setup is worth it
If your phone supports mobile transit cards, use it. Tapping your phone at the gate is faster than digging around for paper or a plastic card while other passengers move around you.
This short video gives a useful visual on transit card use and gate flow in Japan:
The best setup is the one you’ll maintain. If you already use a mobile wallet daily, put transit there. If you prefer a physical card because your phone battery gets hammered on travel days, that’s fine too. What doesn’t work is improvising at the ticket machine when you’re already late.
Business and Leisure Hotspots Near the Station
The best thing about tokyo teleport station is that it doesn’t trap you in a purely business district or a purely tourist zone. You can arrive for work, handle what you need, and still use a spare hour well.
If work is the priority
For Tokyo Big Sight, the main question is whether to walk partway or transfer to Yurikamome. If you’re in formal shoes, carrying presentation material, or trying to arrive composed, the transfer is often the better choice. If you’re traveling light and the weather is good, walking portions of Odaiba can be pleasant, but it’s rarely the sharpest move when the clock matters.
For office visits or meetings in the broader waterfront area, tokyo teleport station gives you a strong base because it drops you near major commercial zones. That makes client lunches and coffee meetings easy to slot into the day without a second train ride.
A practical pattern I’ve used is simple:
Morning: arrive through tokyo teleport station, finish the core meeting first.
Midday: take lunch in Aqua City or a nearby complex where views soften the tone of the conversation.
Afternoon: transfer only if the second venue requires it.
If you only have a short free window
Odaiba can eat an entire day if you let it. Don’t try to “do Odaiba” between meetings. Pick one thing.
Good short-window choices include:
Fuji TV area: strong visual payoff without demanding a complicated plan.
DiverCity Tokyo Plaza: useful if you need a meal, quick shopping, or a simple rendezvous point.
Waterfront walk segments: best for clearing your head before heading back into central Tokyo.
If you have more time and want a more memorable stop, digital art spaces and major entertainment venues in the broader Odaiba area are worth considering, but only if you’ve booked ahead and you’re not gambling on a same-day squeeze.
Odaiba rewards selectivity. One good stop between commitments feels better than rushing through three.
For client-facing downtime, choose places with an obvious landmark and easy return path. Malls around tokyo teleport station work well for this because nobody gets lost for long, and there’s usually a clear fallback option if a restaurant is busy.
Automate Your Itinerary with an AI Assistant
The slow part of a Tokyo business trip usually isn’t the train ride. It’s the planning stack before it. Compare routes. Check luggage logic. Save booking emails. Add a meeting address. Look up whether a transfer is worth it. Then do it again when your arrival shifts.
That’s exactly the kind of work an AI assistant should take off your plate. Instead of opening five apps, you give one clear instruction: arrive at Narita, get to Odaiba with the least hassle, keep the morning route to Tokyo Big Sight clean, and make sure everything lands on the calendar.
That approach works best when the request is concrete. For example: arrive at Haneda, get to the hotel near tokyo teleport station, leave enough margin for check-in, and suggest a client dinner nearby with easy access back to the station. A capable assistant can turn that into an executable day instead of a rough note.
If you still like mapping things manually before handing them off, these discover the best trip planning templates can help you think through the structure of the trip without overcomplicating it.
For travelers who want one place to coordinate planning, schedules, and follow-through, an AI layer like smart travel assistance makes the most sense when the itinerary has moving parts. Airport arrival, rail connection, hotel timing, dinner reservation, next-morning departure. That’s where automation pays off.
The win isn’t novelty. It’s cognitive relief. You keep your attention for the meeting, the pitch, or the event. The logistics stop competing for it.
Superchat works well for trips like this because it can help turn a plain-language request into actions across planning, booking, payments, and scheduling. If you want fewer tabs, fewer missed details, and a cleaner business travel day, try Superchat.


